Sunday, June 25, 2017
Read Twitter as a Newspaper With Paper li
Read Twitter as a Newspaper With Paper li
It may be difficult for you to search the hundreds of links people you follow on Twitter are sharing every day. Here is Paper.li which can help you .This application can make any Twitter feed look like an online newspaper website, complete with headlines, photos, articles, and a newspaper-style layout.It automatically organizes the content into topics , extracts summaries , multimedia and context.You can also create a Paper.li newspaper of your own, just sign in with your Twitter account.It examines links that you share on Twitter, and links shared by people you follow, to produce what it calls a “daily newspaper.”.You can go ahead and create your own customized version of newspaper with just the news that interests you. There are a vast range of subjects, topics and articles covered in each edition.

Paper.li is free, you can log in either with Twitter or Facebook and create your own page in addition to continuously updated for 5 -Newspaper on Twitter hashtags(#) or users.It is a cool service for anyone who wishes to exercise Twitter times from a different angle .
Visit : http://paper.li/
Go to link Download

Monday, June 5, 2017
Place a text in image Photoshop tutorial
Place a text in image Photoshop tutorial
 |
| Place a text in image , Photoshop tutorial |
Hello my visitors
With this tutorial for beginner i will show you how to place an image in text using adobe Photoshop , very simple and you can do this step in less than two minute , just follow my step in my video below.
www.twitter.com/laremdesigner
Go to link Download
Sunday, June 4, 2017
Quickly Create a Website With Adobe Muse CC 2016
Quickly Create a Website With Adobe Muse CC 2016
Overview About Adobe Muse CC
How can Starting Out Adobe Muse CC

Master Pages
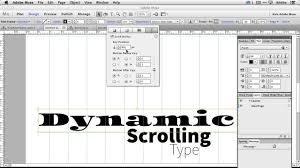
Navigation Widget
Slideshow Widget
About Page
Animation
Publish
Video Guide
Go to link Download
Friday, May 12, 2017
Perbedaan GPS dan A GPS
Perbedaan GPS dan A GPS
Global Positioning System (GPS)
menyediakan informasi posisi
secara terus menerus di berbagai
tempat di bumi. Karena GPS dapat
diakses oleh sejumlah orang yang
tidak terbatas, maka GPS adalah
sebuah sistem yang pasif.
Oleh karena itu, orang hanya dapat
menerima sinyal satelit dengan
bantuan GPS receiver.
Sedangkan Assisted GPS (A-GPS)
mendapatkan bantuan dari base
station dalam penentuan posisi.
Sehingga receiver GPS dapat
memproses lebih cepat, akurat,
dan efisien.
Quote:
Apakah A-GPS?
Assisted Global Positioning
System (A-GPS) membantu
perangkat mobile Anda dalam
menemukan satelit.
Saat menggunakan A-GPS,
perangkat mobile Anda menerima
informasi satelit yang berguna dari
server data bantuan melalui
jaringan seluler.
Apabila perangkat mobile Anda
tidak menerima data bantuan, A-
GPS akan mendeteksi satelit yang
ada. Dengan data bantuan
perangkat mobile Anda dapat
mendeteksi set satelit yang layak
didengarkan, yang mana, satelit
pada sisi planet yang sama
dengan perangkat mobile Anda. A-
GPS mempercepat penghitungan
lokasi yang ditandai.
Quote:
A-GPS tersedia di seluruh negara
dan tidak tergantung pada layanan
operator khusus.
Quote:
Apa manfaat dan keuntungan dari
A-GPS?
A-GPS didesain untuk
mengaktifkan perangkat mobile
untuk menangkap sinyal satellite
lebih cepat dan dapat dipercaya
daripada dengan GPS standalone.
Sebagai contoh, positioning
diperoleh lebih cepat dalam
keadaan cold-start, yang mana,
apabila koneksi GPS telah
dimatikan dalam waktu lama, atau
apabila pengguna telah melakukan
perjalanan ke negara lain.
Dengan A-GPS, waktu perkiraan
untuk membangun koneksi GPS
menurun secara signifikan. Karena
memerlukan beberapa saat bagi
perangkat mobile untuk
menggunakan GPS untuk
membangun koneksi GPS dalam
keadaan cold-start,
A-GPS mengurangi waktu yang
diperlukan umumnya menjadi
puluhan detik. Sebagai tambahan,
A-GPS mengurangi waktu yang
diperlukan perangkat mobile untuk
menemukan posisi saat ini,
dikenal sebagai ‘Time To First
Fix’ (TTFF), untuk sebagian besar
lokasi geografis dunia.
Quote:
GPS mempunyai beberapa batasan
yang juga diterapkan pada A-GPS.
Sebagai contoh, keberadaan dan
kualitas sinyal dipengaruhi oleh
bangunan, gangguan alam, kondisi
cuaca, dan lokasi pengguna.
Apabila Anda berada dalam
ruangan, pindah ke luar ruangan
yang terbuka. Pastikan juga
bahwa tangan Anda tidak
menutupi penerima GPS, yang
terdapat di bawah perangkat
mobile Anda.
Quote:
Jaringan seluler dan koneksi data
apa yang digunakan untuk A-GPS?
A-GPS menggunakan koneksi
jaringan seluler 3G dan 2G dan
koneksi data paket GPRS dan
EGPRS. Anda juga harus
mempunyai titik akses internet
yang ditetapkan pada perangkat
mobile kompatibel Anda. Titik
akses LAN Nirkabel (WLAN) tidak
lagi didukung saat menggunakan
A-GPS.
Quote:
Di mana saya dapat menggunakan
A-GPS?
A-GPS memungkinkan worldwide,
selama Anda mempunyai akses ke
jaringan seluler dan koneksi data.
Anda juga dapat menggunakan
layanan selain jaringan home Anda
(saat roaming). A-GPS tidak
tergantung pada layanan operator
khusus.
Quote:
Berapa biaya A-GPS?
Mendownload data bantuan
melibatkan transmisi sejumlah
data melalui jaringan service
provider Anda. Umumnya
mendapatkan koneksi GPS dengan
A-GPS memerlukan kurang dari
10kB data yang harus ditransfer.
Semua biaya transmisi data
dibayar oleh pengguna.

Go to link Download
Monday, May 8, 2017
Pokémon Go A Guide for Parents HiTechMom com
Pokémon Go A Guide for Parents HiTechMom com

Go to link Download
Thursday, May 4, 2017
Pssst anybody wanna buy a Sony A200
Pssst anybody wanna buy a Sony A200
For the last few posts (and over the last month) Ive been raving about the Sony A200 digital SLR. And with good reason. Its a cracker of a camera, and Ive thoroughly enjoyed using it. So why the heck, you might ask, am I selling it!
Very good question... and one answer might be "Because thats what I do". I buy and sell cameras. Mostly.
Another answer might be "Because I really needed to qualify what I used, and why I used it." And the logical conclusion to this technological naval-gazing, ultimately, was that Im a Nikon shooter (love my D300), so the Sony A200 - as much fun as it was - had to go.
And really, thats my answer, and Im sticking to it.
Winter is always a time for me to take stock of my gear (quite literally), and look back over the last wedding season to decide what worked, what didnt, and what I can improve on. Perhaps because I purchased the Sony, Ive also been looking very seriously at my whole system - what Im using, what Im not using - and maybe even more importantly, what Id like to be using. Quite frankly, the answers surprised me.
Ive decided that 1.) I am a Nikon shooter. So the Sony has to go. If I want a second body it will be a Nikon - and in the meantime I will continue to take my wifes D70 with me on shoots as backup. Its been working fine like this, and I see no reason to change it for the next wedding season. Together with this decision is the fact that I am still very happy with the D300, and see no reason to upgrade the camera at all. I dont feel the need to go full frame, and have always been more than happy with the quality (and file sizes) I get with the APS-C sized sensor - so thats another decision in the D300s favor. Nor do I yearn for HD video capabilities in my SLRs - so that gives me another few years grace from upgrading. Im sure that the next camera I get will have HD video capability, but not because I want it - simply because all cameras will have it as standard whether we want it or not :-(
Ive also decided that 2.) Most of my lenses are redundant! Ive finally realised (after 25 years) that there is a huge difference between lenses I want to own, and lenses Ill actually use. If Im being brutally honest (and I am), there are currently only two lenses that I use (regularly) when I go to a wedding - my Nikkor 18-70mm standard zoom, and my Nikkor 50mm f1.8 prime. If I use any other lens, I make myself get it out and use it. So what am I carrying the rest of them around for?
My 24mm f2.8D is a gorgeous lens - but it isnt wide enough for landscape work on a DX body like the D300, so I dont use it. Likewise, my 85mm f1.8 is a beautiful lens, but again I find the focal length (135mm) on the D300 less than practical for my style of shooting. I much prefer the 50mm (75mm) view and so find myself using that instead. On traditional 35mm film cameras, the 24mm and 85mm prime lenses are classic lenses to own and use - so I own them. But Im finding that, on a DX digital body, Im not using them.
Do I keep them for when I go full frame with a Nikon D700? Well, no, because Ive already decided that I have no intention of changing to a full-frame camera anytime soon (never say never), so I need to look at what I might actually use on the camera I have.
So the final decision is that 3.) I need to buy an ultra-wide lens for my landscape photography. As mentioned I can, and do, shoot weddings with just two lenses - and I am more than happy with the results. But when I go out to take my own landscape images, I am constantly wishing I could go wider. My current lens collection is lacking an ultra-wide for my landscapes.
After a week or so of internet trolling and review reading, Ive decided to sell my 24mm, 85mm and 70-300mm f4/5.6 ED - and get a Tokina 12-24mm f4 ultra-wide angle lens. Why this particular lens? Well, for a start, with the money I get from selling the other lenses, the Tokina will be in my price range (the Nikkor 12-24mm wont be) - and of all the third party lens manufacturers, I like Tokinas quality the best (Tokina was started by ex Nikon lens engineers who wanted to make their own range). Im not an ultra-wide junky, so the 12-24mm (18-36mm 35mm equivalent) focal range is a good compromise (as opposed to the 10-20mm Sigma which was the other lens I was interested in).
If, between now and then, a used Nikkor 12-24mm comes on-line in my price range, then Ill probably grab that instead. But if I buy brand-new, then it will be the Tokina.
So my Nikon kit will go down from a 6 lens kit to a three lens kit - but it will be three lenses that I will actually use. The other good news? A much lighter camera bag :-)
Go to link Download
Friday, April 14, 2017
Puppy Linux A Linux distribution that runs completely on RAM
Puppy Linux A Linux distribution that runs completely on RAM
Over years size of software along with processing power of computers have increased considerably , i still remember the first Linux distribution i used was Red Hat Linux 5.2 came on a single CD , now RHEL or Fedora comes on a DVD or 5-6 Cds , even Windows has grown tremendously in size , memory requirement have zoomed the latest Windows Vista requires almost 2GB of Ram and a fast processor to run flawlessly. Now here is a shocker Puppy Linux is a Linux distribution that is only 28-70 Megabytes in size and come fully featured Graphical Desktop with Web Browser , Word Processor , Download
According to Puppy Linux Website the goal of Puppy Linux is to create a Linux distribution that is user friendly , quick to run and include all the applications that user needs .
Installing puppy Linux is not all that difficult download the ISOs from their website and burn it on a cdrom now after this boot from the cdrom on booting puppy Linux it asks a number of questions regarding Hardware Configurations , Video Card and Monitor and stuff ,after completing these steps Puppy Linux boots into impressive graphical desktop in less than a minute . You dont have to enter these information everytime you boot they can be saved on hard-disk or USB Flash memory or burned on a cd so that you dont have to enter these information everytime you boot Puppy Linux . Now i have to admit i wasnt expecting such a good graphical environment on puppy Linux considering it is only 70 Megabytes in size . The user interface was extremely responsive helped by the fact it was running entirely on RAM and it wasnt accessing data from hard disk frequently which is significantly slower than accessing data from RAM .
Now Puppy Linux since aims to be a distribution for newbies so icons were very logically named write , draw , connect and other user friendly captions were provided for different programs , So that new Linux user dosent have any problem recognizing programs which he might have not seen earlier .
This is how Puppy Linux Desktop Looks : -

What is included ?
Some of the important Application that are included with Puppy Linux includes : -
1. Sea Monkey Web browser
2. AbiWord Word Processor
3. Ghostview PDF Viewer
4. Axel Download Accelator
5. Dillo Web browser
6. Gxine Media player
7. DVD Video ripper ( :) )
8. Gnumeric Spreadsheet Program
9. Inklite Vector Editor
10. mtPaint
11. A collection of small games
and other programs
Now i access Internet through LAN , i had no problem installing LAN on puppy Linux it provides a very useful graphical tool for configuring Internet connection through LAN or modem .

The Web Browser that is included with Puppy Linux is Sea Monkey which is based on Mozilla code base same as Mozilla Firefox. I Did not encounter any problem in using Internet through Sea Monkey most of the website rendered without any problem . Even Macromedia/Adobe Flash Extensions was installed by default this is really wonderful packing in fully functional web browser with Macromedia flash plug in along with other applications in 70 megabytes .
 Browsing Internet through Sea Monkey Web Browser
 Gnumeric : A Lightweight Spread Sheet program that is quite usable
 Media Utility Tool to Mount drives
Now Gxine in Puppy Linux comes with number of codecs though w32codecs package is not installed by default so some audio/video files may not play well but most of the popular ones did play without any problem i tried playing avi,mpg ,Video CDs and other files all played well with minor adjustments .
 Gxine : A Media Player included with Puppy Linux based on Xine Framework
Even though Puppy Linux comes with wide array of application you can install more application from puppys application repositories , Puppy Linux uses (.pup) files for applications and if you cannot find particular installation file you can also use debian packages for installing applications on Puppy using alien . Puppy Linux uses different file format for installing application since Puppy Linux is not based on any other Linux distribution but was created from scratch by Puppy Linux creator Barry Kauler.
If you are feeling bored there are collection of neat games that comes with puppy linux enabling you to have fun on puppy Linux .
 Classic Mine Sweeper game comes pre-installed with Puppy
 Drawing tool that come pre-installed with Puppy Linux
Article written by : -
Ambuj Varshney (blogambuj(at)gmail.com)
for Linux on Desktop , (C) 2007
Go to link Download
Tuesday, April 11, 2017
Puerto Princesa tour package Underground River Palawan a worthwhile experience
Puerto Princesa tour package Underground River Palawan a worthwhile experience
Boarding a small paddle boat with nine passengers including the boatman. We proceeded to the cave. To be seen are mysterious rock formations with beautiful surrounding.
A 45 minute return trip by boat, the Underground River internationally renowned as one of the New Seven Wonders of Nature, is certainly a worthwhile experience.
Itinerary and Inclusions:
Day 1 (Flight to Puerto Princesa c/o guest), should arrive before noon, airport pick-up, transfer to Puerto Princesa hotels, 130pm Puerto Princesa City - Tour
Day 2 Breakfast, 7am Honda Bay Palawan - Island Hopping with lunch, Seafood dinner at Kalui
Day 3 Breakfast, 7am Palawan Underground River with lunch
Day 4 Breakfast, final drop off to the airport for departure flight
Asia Novo Hotel Puerto Princesa, Palawan package itinerary and inclusions at the top of the page
2/room 5600 each
Please add airfare
Advance booking required.
Google shore 2 shore travel to see other products and services
To book, please contact
Shore 2 Shore Travel Services
We can be reached during office hours at:
Office: (63-2) 5796603-04
Mobile number (63-906) 9003019; (63-923) 2880661; (63-999) 6040017
Email shore2shore.mlaofc@gmail.com
http://www.shore2shore-travel-services.com
from Classified Ads Puerto Princesa tour package, Underground River Palawan, a worthwhile experience
Go to link Download
Wednesday, February 22, 2017
Prohack Advertising Rates Slashed – Reach to a wider audience !!!
Prohack Advertising Rates Slashed – Reach to a wider audience !!!
Prohack, your favorite technology blog has expanded a lot in quite a short span of time and is celebrating in unison its ascent with you guys :) 
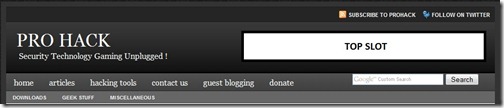
- Top Slot - The top slot catches everybodys eye and always remains at the apex at rock bottom cost.The top slot to the right of header (ad size - 468 X 60 Full Banner, No Flash) for 33$ per month, 15$per week , 165$ per year (less than 14$ per month!!!) and 320$ for 2 years (less than 14$ per month !!!)
- Repeating Slot - Gives you the maximum exposure on Prohack, this is the most recommended ad slot on Prohack,the slot is available after each post (both in random and expanded view,ad size - 468 X 60, No Flash) 35$ per month,20$ per week,170$ per year ( ~about 14$ per month !! ) and 335$ (less than 14$ per month !! ) for 2 years.
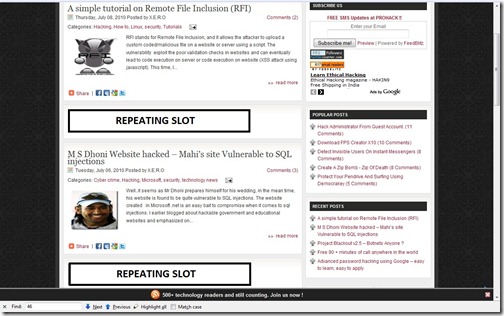
- Sidebar Slot- This is where you have ample opportunity to drive your visitors :) 30$ per month (Nofollow),33$ for dofollow, 135$ per year ( about 12$ per month !!!).
- Text Links on sidebar - 20$ per month (Nofollow),23$ for dofollow, 150$ per year (less than 13$ per month). Dofollow link Prices 160$ per year (less than 14$ per month) .
- Twitter tweets - 10$ for 3 tweets in 1 month.Bonus : add Facebook rants for 20$ per month for 3 twitter tweets and 3 facebook rants !!
- Article Text links - Text link " Dofollow "Ads will be included in the starting,mid or bottom of a relevant article,as the article will not be deleted except in exceptional circumstances,those links will be yours forever and will improve your Google rankings. Only one ad per article is allowed and costs 20$ per article with few words to define your self. For eg -
Build your links with the best on the web. Visit XYZ.COM
- Article advertising - I will be writing an 800-1000 word article about your website/company/enterprise which will include exclusive advertising.The featured article will be for visible for a period of 2 weeks to 1 month on the website front page providing ample view for readers to feed out on your offerings. The gives your review maximum exposure to PROHACK readers. I will be permitting 1 image for a logo and at max 2 images for your agenda. You have to provide me the main theme and the dos and donts for your firm/enterprise/company/website. 50$ per article is the standard price.
Payments must be done Via PAYPAL in advance, plus, if you have competitors, as an added extra bonus on subscribing the yearly scheme of advertising, we will remove 2 of your competitor websites from our Google Adsense and block them off, so you can enjoy full attention of our followers :)
You are free to choose your advertising scheme and negotiate accordingly.
So ?!! What are you waiting for ? Speak to your audience :) you can contact me at admin[at]theprohack.com
Like This post ? You can buy me a Beer :)
Posted by XERO. ALL RIGHTS RESERVED.
Go to link Download
Monday, February 20, 2017
Purisrar Haqaiq a book of Islamic tratments PDF
Purisrar Haqaiq a book of Islamic tratments PDF
Sample pages of the Urdu book Purisrar Haqaiq


Download link of Purisrar haqaiq
Click on the given link below to download this Urdu book.Go to link Download
Monday, February 13, 2017
Ramit Sethi – Live a Richer Life Download Now
Ramit Sethi – Live a Richer Life Download Now
You can’t wish your way to financial stability and success – you have to take action. In Session: Live a Richer Life, Ramit Sethi will talk strategy for getting on the path to wealth.
He’ll give you the rundown everything from picking your idea to landing your first customer.
He’ll also talk to in-studio guests Vanessa Van Edwards and Chase Jarvis to discuss how they built their businesses.
Read More
Download Links (321 MB) This content is for members only.
Download Here
Go to link Download
Saturday, February 4, 2017
Payal Novel Written By M A Rahat Complete 5 Parts Download Free
Payal Novel Written By M A Rahat Complete 5 Parts Download Free

Payal Novel Written By M.A Rahat Complete 5 Parts. M.A Rahat is very famous writer of Urdu Novels and stories. So here is another novel from his popular novels collection which I have got. So download All 5 parts of this novel and have a nice stay here. Download link is given below.
Click Here To Download Part 1
Click Here To Download Part 2
Click Here To Download Part 3
Click Here To Download Part 4
Click Here To Download Part 5
Go to link Download
Monday, January 30, 2017
Payoneer registration tutorial HOW TO APPLY AND GET A PAYONEER MASTERCARD
Payoneer registration tutorial HOW TO APPLY AND GET A PAYONEER MASTERCARD
Payoneer registration tutorial HOW TO APPLY AND GET A PAYONEER MASTERCARD
Payoneer is a US Online Payment Service that allows you to receive ACH/Direct deposit payments from some US and UK online companies like PayPal, Amazon, Skrill, Peerfly, ClickBank, Cupid PLC etc.
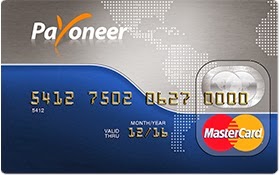
If you an affiliate marketer or run online businesses, Payoneer Payment Service allows you to get your money through direct deposit option. It also allows you to get all your money in one place.
There are no monthly or annual fees if you use this service.
There is a one time registration fee after you get your card for free, a 1% fee for each payment transferred to your card and a fixed fee per transaction when you make a withdrawal from your card at the ATM or Online stores. You can make your withdrawal in your local currency.
We are going to show you how to get your Payoneer MasterCard card.
Steps 1
Go to the offficial payoneer website to register at The sign up page will open in another tab. Click on "Sign up with Payoneer".
Step 2
Choose the individual Payoneer account except you are signing up as a partner. Click on "Apply Now" as shown below.
Step 3
On the next page click on "Sign Up" to continue.
Step 4
The registration is a three step process where you will be required to fill your personal details, account information and make a personal verification. Fill your details with the right information because they are going to verify everything later.Note that if you use the wrong postal code, you will not get your card in time. Go to the Nigeria Postal Service site to get the right code. Postal code is not 23401 or something like that. Check that site to see the right code.
Click on the "Start Here ..Personal Details" to continue

Step 5
Fill in your personal details. Fill in your names, email address, your home address and everything as shown on the page. Your email will be verified so input your main email address.
Step 6
Choose a unique username, pick a password and select a security question.
Step 7
Input your country of birth, nationality and choose a government issued ID card. Make sure the ID card you choose has details like your name, home address, recent photo of you, date of birth and every personal detail in filled in step 4. You will be required to scan this ID and upload it to them.Tick each box below the page and click on "Finish"

Step 8
You will get an email that your account is under review. Later you will get an email to provide a copy of a government issued ID card you supplied during the third registration stage.Make a scan of your chosen ID at a print resolution of 300 ppi so that all your details will be as clear as possible. You can scan your INEC voting slip together with your other ID to make the process faster.
Step 9
Once you do this, wait for an email to confirm your account approval. When approved, you will get a confirmation email with the date your prepaid mastercard is estimated to arrive.The card will be shipped to you free of charge through your postal code you supplied. You will have to check your post office for that.
Step 10
You will get your US payment service information before your card arrives. Details include your US bank name, your account type, your account number and bank routing number.Note that at this time, your US Payment service account has not been verified yet.Also note that your account number is different from your Payoneer card number.
Step 11
Once your Payoneer card arrives, you will have to activate the card online in your US Payoneer online account. go to and select "Activate your Card".
Just fill in your prepaid card number and choose a 4 digit pin and you are done.

Congratulations, you can now receive money from most US and UK affiliate programs and payment services through direct deposits and withdraw your money in your local currency at any ATM with MasterCard logo worldwide.
Note
- You can check your balance, your transactions list, card fees and related information online anytime of the day, free of charge. Just click on "My Account" and enter your username and password (which you chose upon registration)
- You get charged 1% for each each payment transferred to your card from Paypal, Peerfly, Skrill, Amazon, ClickBank etc. and also some small fee for making withdrawal from your Mastercard at any ATM worldwide.
Go to link Download
Sunday, December 25, 2016
Pick a file using Intent ACTION GET CONTENT
Pick a file using Intent ACTION GET CONTENT
This tutorial is tested on Honeycomb 3.0 environment. In order to be used it in the lower level of Android API, I believe you could just change the target in the Android project.


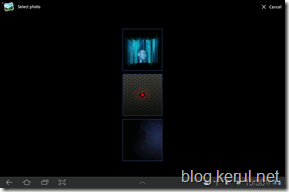

Screenshots
Pick an image file using Intent.ACTION_GET_CONTENT
The intention of this project is to choose an image file available in the device storage, and simply display it in an ImageView. The benefit of using Intent.ACTION_GET_CONTENT is you don’t have to develop open dialog box which is not available in the Android library.
ACTION_GET_CONTENT with MIME type */* and category CATEGORY_OPENABLE -- Display all pickers for data that can be opened with ContentResolver.openInputStream(), allowing the user to pick one of them and then some data inside of it and returning the resulting URI to the caller. This can be used, for example, image chooser (as shown in this article).
LAYOUT: main.xml
<?xml version="1.0" encoding="utf-8"?>
<LinearLayout >="http://schemas.android.com/apk/res/android"
 android:layout_width="fill_parent"
 android:layout_height="fill_parent"
 android:orientation="vertical" >
 <TextView
 android:layout_width="fill_parent"
 android:layout_height="wrap_content"
 android:background="#0000ff"
 android:text=" " />

 <Button
 android:id="@+id/Button01"
 android:layout_width="wrap_content"
 android:layout_height="wrap_content"
 android:text="Choose image using Intent.ACTION_GET_CONTENT" />


 <ImageView
 android:id="@+id/imageView1"
 android:layout_width="wrap_content"
 android:layout_height="wrap_content"
 android:src="@drawable/ic_launcher" />

</LinearLayout>
SOURCE: ImagePickerActivity.java
package net.kerul.imagepicker;

import android.app.Activity;
import android.content.Intent;
import android.database.Cursor;
import android.net.Uri;
import android.os.Bundle;
import android.provider.MediaStore;
import android.view.View;
import android.view.View.OnClickListener;
import android.widget.Button;
import android.widget.ImageView;
import android.widget.Toast;

public class ImagePickerActivity extends Activity {

 //YOU CAN EDIT THIS TO WHATEVER YOU WANT
 private static final int SELECT_PICTURE = 1;

 private String selectedImagePath;
 //ADDED
 private String filemanagerstring;
 private ImageView imageView1;

 public void onCreate(Bundle savedInstanceState) {
 super.onCreate(savedInstanceState);
 setContentView(R.layout.main);

 imageView1=(ImageView)findViewById(R.id.imageView1);

 ((Button) findViewById(R.id.Button01)).setOnClickListener(new OnClickListener() {

 public void onClick(View arg0) {

 // in onCreate or any event where your want the user to
 // select a file
 Intent intent = new Intent();
 intent.setType("image/*");
 intent.setAction(Intent.ACTION_GET_CONTENT);
 startActivityForResult(Intent.createChooser(intent,"Select Picture"), SELECT_PICTURE);
 }
 });
 }

 //UPDATED
 public void onActivityResult(int requestCode, int resultCode, Intent data) {
 if (resultCode == RESULT_OK) {
 if (requestCode == SELECT_PICTURE) {
 Uri selectedImageUri = data.getData();

 //OI FILE Manager
 filemanagerstring = selectedImageUri.getPath();

 //MEDIA GALLERY
 selectedImagePath = getPath(selectedImageUri);
 //just to display the imagepath
 Toast.makeText(this.getApplicationContext(), selectedImagePath, Toast.LENGTH_SHORT).show();
 //change imageView1
 imageView1.setImageURI(selectedImageUri);

 //DEBUG PURPOSE - you can delete this if you want
 if(selectedImagePath!=null)
 System.out.println(selectedImagePath);
 else System.out.println("selectedImagePath is null");
 if(filemanagerstring!=null)
 System.out.println(filemanagerstring);
 else System.out.println("filemanagerstring is null");

 //NOW WE HAVE OUR WANTED STRING
 if(selectedImagePath!=null)
 System.out.println("selectedImagePath is the right one for you!");
 else
 System.out.println("filemanagerstring is the right one for you!");
 }
 }
 }

 //UPDATED!
 public String getPath(Uri uri) {
 String[] projection = { MediaStore.Images.Media.DATA };
 Cursor cursor = managedQuery(uri, projection, null, null, null);
 if(cursor!=null)
 {
 //HERE YOU WILL GET A NULLPOINTER IF CURSOR IS NULL
 //THIS CAN BE, IF YOU USED OI FILE MANAGER FOR PICKING THE MEDIA
 int column_index = cursor
 .getColumnIndexOrThrow(MediaStore.Images.Media.DATA);
 cursor.moveToFirst();
 return cursor.getString(column_index);
 }
 else return null;
 }
}
References;
- http://stackoverflow.com/questions/2169649/open-an-image-in-androids-built-in-gallery-app-programmatically
- http://android-er.blogspot.com/2011/03/pick-file-using-intentactiongetcontent.html
Go to link Download